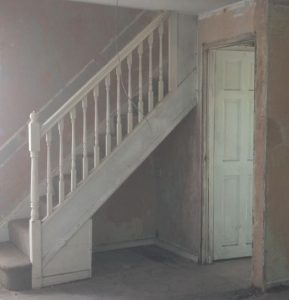
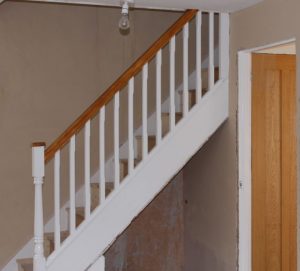
You can renovate a staircase yourself, without spending a small fortune, with some DIY skills and a pinch of imagination. A staircase is often a part of your home that makes a statement. It’s usually one of the first things that you see when you walk into your home, so it makes sense to use it as a focal point. However, there is a misconception that if your staircase is old and tired, or perhaps not to your taste, you’re stuck with it, but this isn’t true!


Plan First
Like anything you renovate, you should have a firm plan in place before you start. You’ll need to decide what you want to change – do you just want to change the handrails, or do you want to re-do the steps? Once you’ve decided what you want to change, you can order the stair parts you need. Make sure to familiarise yourself with terms such as ‘spindles’ aka the vertical posts that hold up the handrails, ‘risers’, also known as the steps themselves, and ‘newel posts’ which are a structural element at the end of the banister. You should decide if you need winder steps – winder steps are narrower at one side, and they can change the direction of a staircase without the need for a landing.
To plan your new staircase, you’ll need to do some measuring. You can check the length of your handrail and base rail by measuring the distance between the newel posts at the top and bottom of your stairs. To understand how many spindles you’ll need, account for two per step, with the distance between the two spindles being no more than 99mm.
There are a lot of stair parts involved in planning a staircase renovation, and they can vary in their design. It’s easy to feel confused in the planning stages, so always ask your stair part provider for assistance if you’re not sure what you need to order.
Replace Steps and Risers
A staircase renovation always starts with the risers and steps themselves. Take out the old carpet and dispose of any hazardous screws, before measuring the steps and risers. The secret to a successful installation is to put in the first and second riser first, before installing the first step. You can then use mouldings to cover up any gaps.
Renovate the Landing
Before you can renovate the landing, you will need your winder steps and their extensions. Measure the landing area from the back to the front, before adding on 30mm to account for the winder step’s nosing. When installing your winder steps, start with the front portion of the landing, using a winder step to cover it. Seal and secure your steps, before covering them with mouldings or skirting boards.
Replace Newel Posts
Once you have renovated your steps and the landing area, you can get to work with changing the newel posts. To do this, you’ll need to take out the old base rails, handrails and spindles. You can then cut your old newel posts – you’ll need to mark a pitch line by going up two to three steps, before measuring 900mm up the post as this is the minimum height that is required when you’re installing a handrail on a staircase. Lastly, drill a hole in your post base and add your newel post, securing it with a screw.
Fit Handrails and Base Rails
Once you’ve ordered your handrails and base rails, you’ll need to cut them to the angle of your stairs, ensuring that they are the same thickness as the newel posts. Once you have cut it to the correct angle and length, you can install your base rail, ensuring that it is centred on the newel bases. Lastly, don’t forget that the legal minimum height for a handrail is 900mm when installing it – to test that it fits properly, place a spindle on each newel post before gluing them down.
Install Glass Panels and Spindles
When designing your staircase, you will have chosen whether you want to have glass panels or spindles, which are often made of timber or iron. If you chose spindles, you should have received fillets when you ordered your handrail. You can use the fillets to create the space between the spindles by cutting the fillets to the angle of your stairs, and placing one between your newel post and the first spindle. If you chose glass panels, you have two options – panels that must be clamped to the handrails or panels that fit directly into them. Your stair part manufacturer will advise you on how to install glass panels.
The Finishing Touches
Now that the structural element of your new staircase is done, you can focus on the finishing touches. As with any room of your home, good lighting is key, and with a staircase, you can really experiment. Draw warm lighting towards your hallway, or fit lights underneath your treads for a contemporary look. This works particularly well if your hallway struggles with natural light. Next up: colour. It can make all the difference to your staircase, so consider a bright patterned runner if you’ve kept the steps neutral, or a statement painted wall. You could even paint the stairs themselves – pastel colours look great for a vintage theme, or monochrome is ideal for a timeless contemporary style.
You should never think that you’re stuck with your tired old staircase. Even if you’re not brave enough to renovate the whole thing, play around with colour and lighting, and you’ll be surprised at the difference!
Find some inspiration for stairs by checking out my Pinterest board
Many thanks to Cheshire Mouldings for their assistance in creating this article
